Oracle SQL Developer is a free Java based integrated development environment (IDE) that offers complete end-to-end development of your PL/SQL applications, a worksheet for running queries and scripts. On the other hand, it simplifies database management through its user friendly interface.
SQL Developer is available on Windows, Linux and Mac Os and is included in your Oracle Database installation or you Oracle Database Client installation. You can also download it directly from Oracle repos.
The IDE is not resource intensive and can run on a PC with 1GB of RAM, a modern processor and a JDK installation from version 1.5.
In this guide, I will show you how to easily configure and connect SQL Developer to your Oracle Database (19c, 18c, 12c).
Configure & Connect SQL Developer to Oracle Database (19c, 18c, 12c)
The configuration process below is the same for the version of Oracle Database 12c, 18c and 19c. Note that if Oracle Database (Release 11 or later) is installed, a version of SQL Developer is also included and is accessible through the menu system under Oracle. In the following, I use a Windows PC and I suppose SQL Developer is already installed.
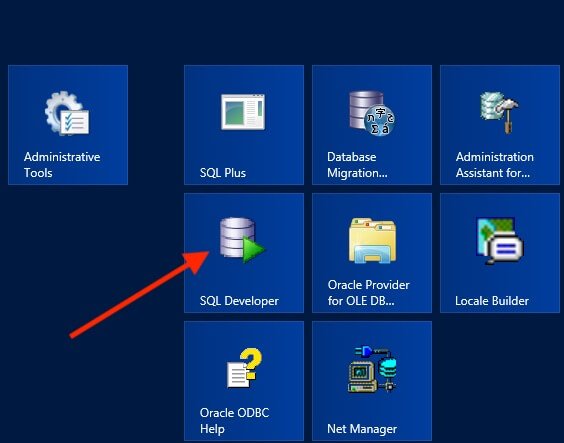
1. Start SQL Developer
To launch SQL Developer, you need to go to Windows Start menu, locate the applications under your Oracle installation, then click on “SQL Developer”.
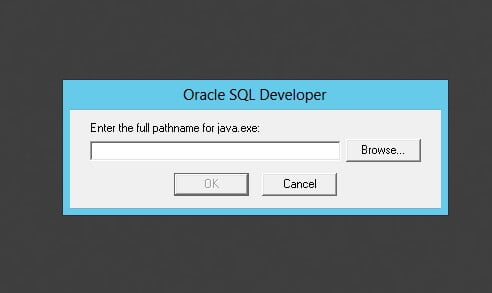
2. Provide the path for the Java Virtual Machine
In this step, carefully provide the absolute path of the JVM (java.exe) you want to use to run SQL Developer. An error on the location of the JRE can make the application unusable. You may have many JRE versions on your PC. I recommend using one that comes with your Oracle Database Installation, more precisely in the JDK folder. Click on the “Browse” button to select the file.
In this example, I use the JRE in the Oracle Home folder.
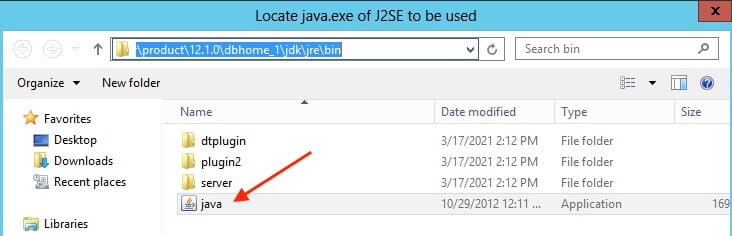 Next, click “OK” to continue.
3. Add a connection to your Oracle Database
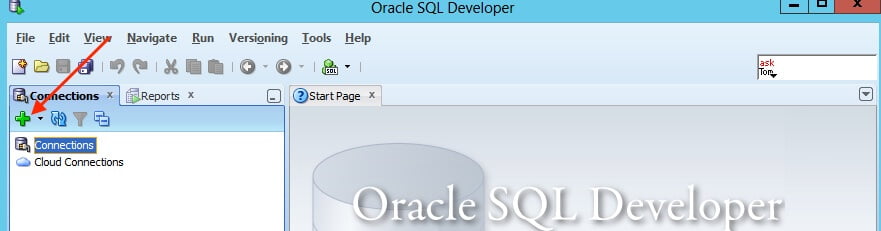
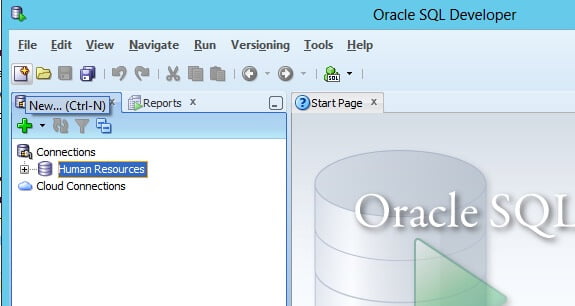
After step 2, you should be able to a access the SQL Developer interface and add a new connection to have access to your database. Click on the “+” to add a new one.
Next, provide the connection details.
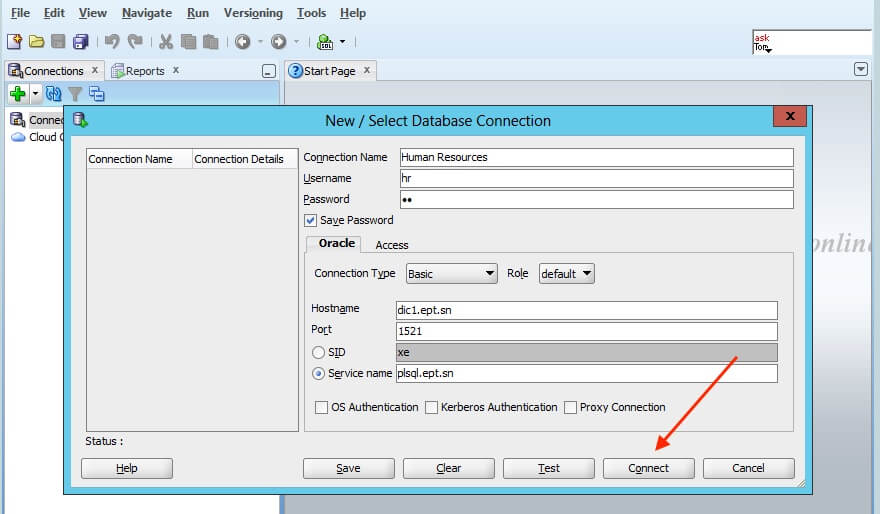
Click “Connect” to gain access to the database. Some times, you may need to perform a “Test” before continuing.
Details of the database connection parameters
- Connection name: the name used to identify the connection;
- Username and password: the username and the password of the account (schema) in the database you want to access;
- Connection type: you can use the database type connection (basic) to access the schema. You can also use a directory like LDAP or advanced connection types;
- Role: Use “Default” or “SYSDBA” depending on your tasks;
- Hostname: domain name or IP address of the Oracle database server;
- Port: the port number which the database instance uses to serve connections. This port number can be found in the listener configuration.
- SID: represents the name of the Oracle Database instance you want to connect.
4. Create and run your first program
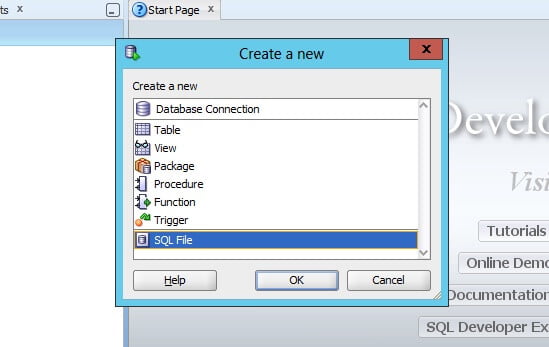
To create a program in SQL Developer, you need to select a database connection, ie: Human Resources and click “CTRL + N” or File –> New and select “SQL File” in the dialog box.
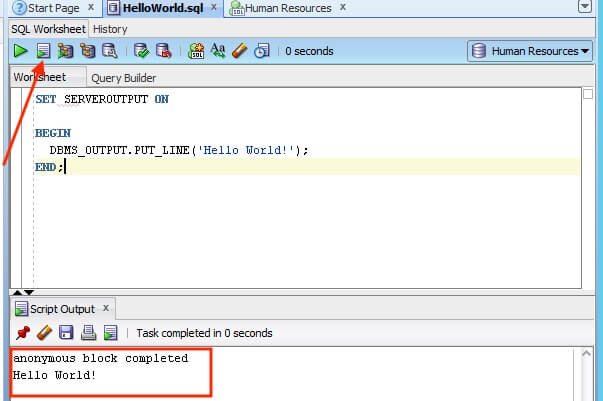
You will thus have access to the code editor on which you can write SQL and PL / SQL instructions. To compile and run the script, you can use the “F5” key or the run button. Don’t forget change the path of the script before running it.
That’s it. Still having questions or suggestion on how to configure and connect SQL Developer to Oracle Database? Feel free to leave a comment below.