Do you want to create a Database in Oracle 19c on Windows Server or Windows 10 step by step? Then this complete guide is for you.
You can create an Oracle 19c database during the installation of Oracle software or after installation with the Oracle Database Configuration Assistant (DBCA) tool. This guide describes the simple steps to create a database in Oracle 19c with DBCA. You can also download my ebook which details the whole database creation process.
Before you begin, ensure that the minimum requirements are met. If you have not yet installed the Oracle software, I recommend you follow this tutorial on installing Oracle 19c on Windows.
Create a database in Oracle 19c on Windows step by step
1. Launch DBCA
The Oracle DBCA tool is available after installing the Oracle 19c software. To launch it, you must log into Windows as an administrator and use one of the methods below:
- open it from the Windows Start menu;
- run the dbca command from the Windows command prompt;
- execute the following combination: “Windows + R”, then type dbca.
2. Select “Create a database” and click “Next”

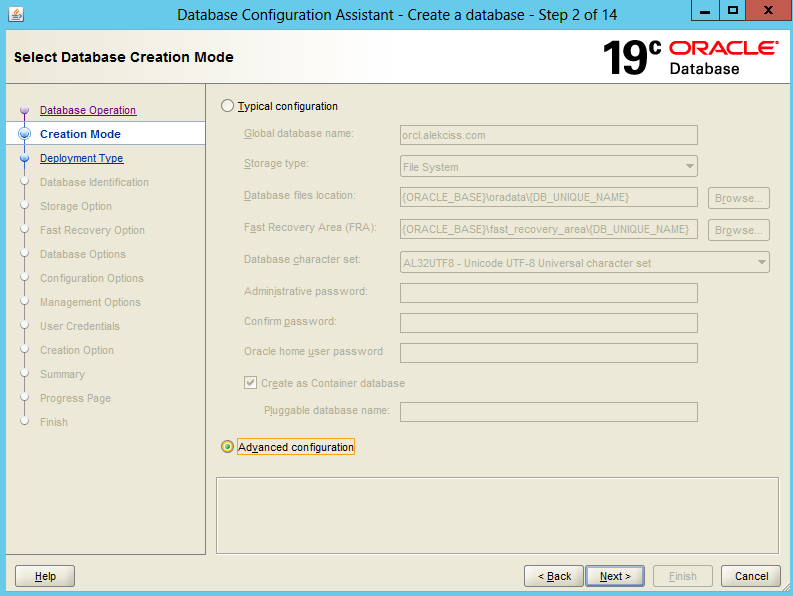
3. Select database configuration mode
DBCA enables you to create a database with typical configuration or with advanced configuration:
- in “Typical configuration” mode, you can set up your database quickly using Oracle prebuilt templates.
- in “Advanced configuration” mode, you can customize storage locations, management options, database options, configuration option, user credentials, etc. It allows you to have full control of your database configuration.
In the following, we use the Advanced configuration mode.
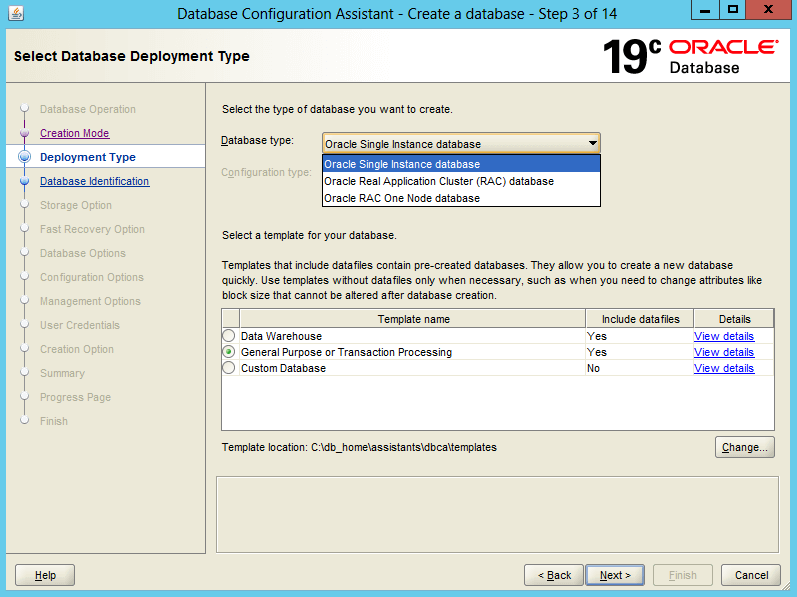
4. Select database deployment type
This step enables you to select the type of database and template to use to create the database. You can select:
- Oracle Single Instance Database
- RAC database
- RAC node database
for the database type and
- Data Warehouse
- General Purpose or Transaction Processing
- Custom Database
for the database template. In this guide, I use “Oracle Single Instance Database” and “General Purpose or Transaction Processing” as a template. However, you can select the type and template suited to the type of workload your database will support. For more information on templates, click on “View details” next to each template.
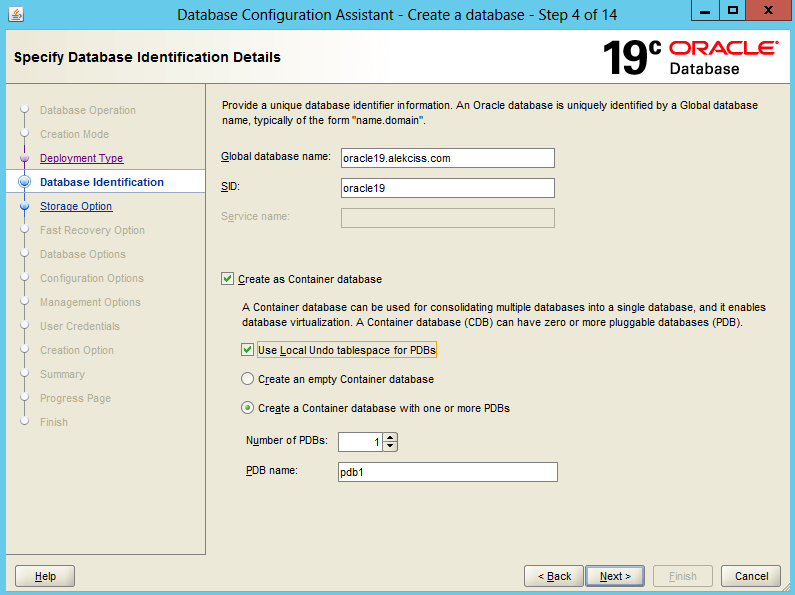
5. Specify database identification details
In this step, provide the global database name, something like “database.domaine_name”. You don’t need to fill the SID. It is created automatically from the global database name.
If you want to create a multitenant container database (CDB), then check Create as Container Database and specify the number of pluggable databases the CDB can support. You can also create an empty CDB.
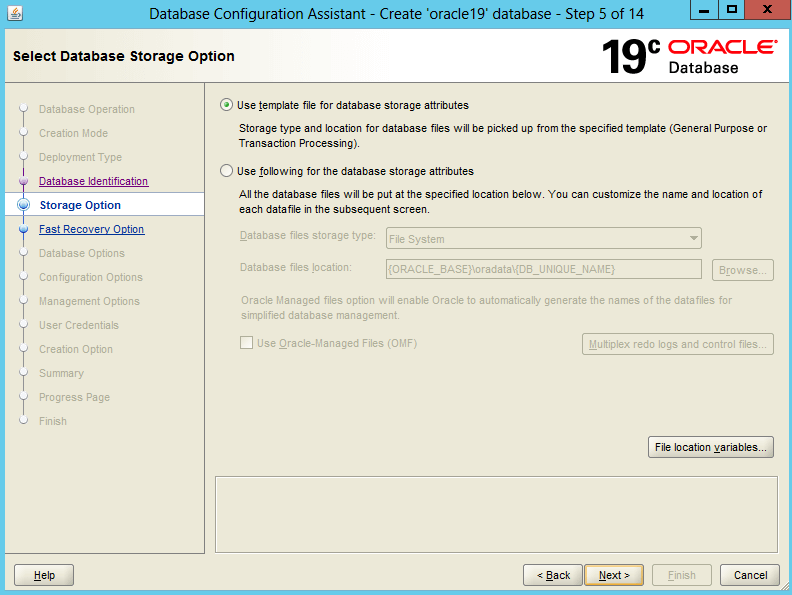
6. Select database storage option
You can customize the database storage options in different ways. Make sure your select “Use template file for database storage attributes” and click “Next”.
If you want to specify your own location to store database files select “Use following for the database storage attributes” option. With this option, you need to choose how the database files will be managed:
- File System option: your operating system will manage your database files.
- Automatic Storage Management (ASM) option: you place your data files in Oracle Automatic Storage Management (Oracle ASM) disk groups.
- Oracle-Managed Files (OMF) option: Oracle Database will directly manage operating system files comprising an Oracle database.
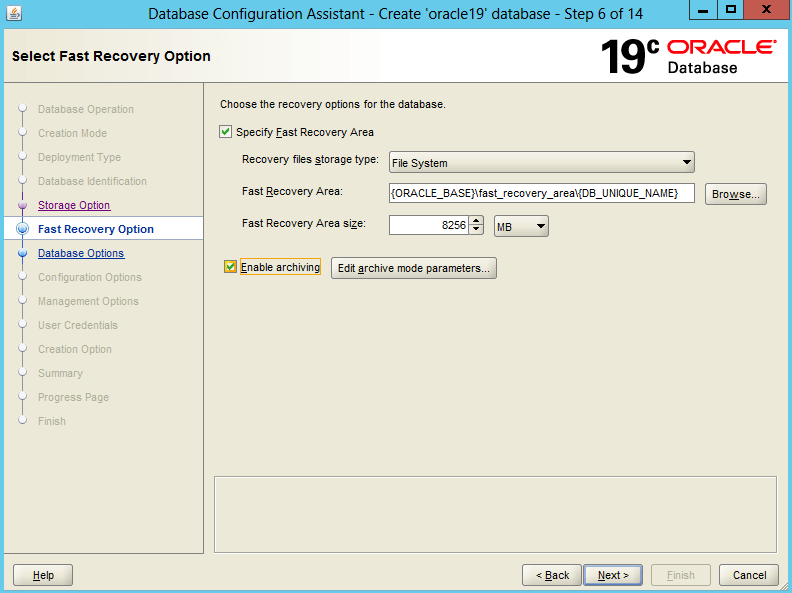
7. Select Fast recovery option
The fast recovery is an essential component of your database. In fact, it allows you to recover your data if a system failure occurs. It is a location in which Oracle Database can store and manage files related to backup and recovery.
Check “Specify Fast Recovery Area” to specify a backup and recovery area and its directory location, file storage type and size.
You can also to enable the archiving of database online redo log files, which Oracle uses to recover a database with the “Enable archiving” option.
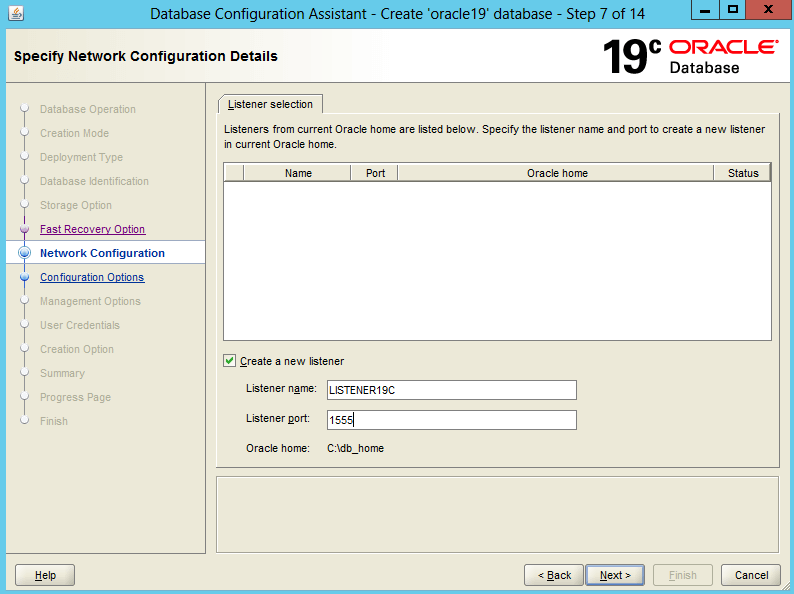
8. Specify network configuration details
Configuring a listener is mandatory if you want to access your database remotely. A listener receives incoming client connection requests and manages the traffic of these requests to the database server.
In this step, you can select among the listeners in the current Oracle home or create a new one by providing the listener name and a port number. Then click “Next” to continue.
You can configure Oracle Database Vault and Oracle Label Security in the next window, or you can click Next to continue through DBCA without configuring Oracle Database Vault and Oracle Label Security. I’ll skip this in this guide.
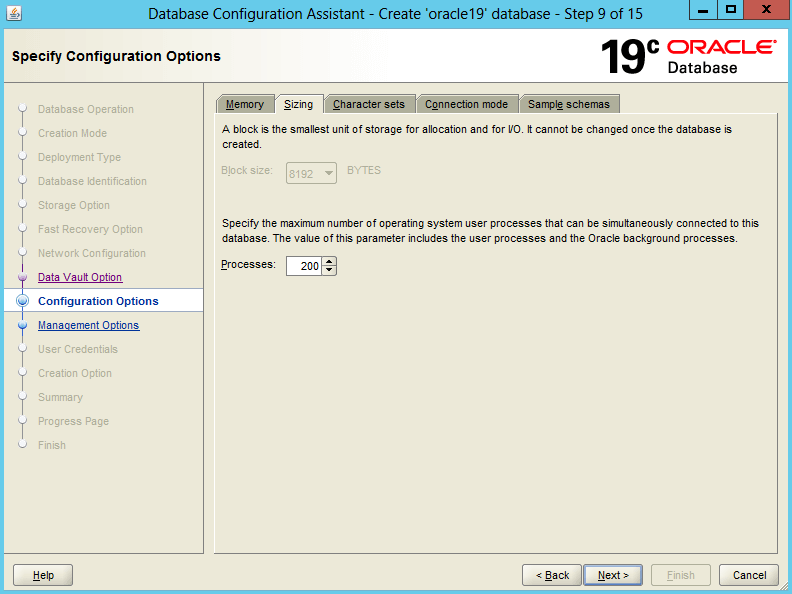
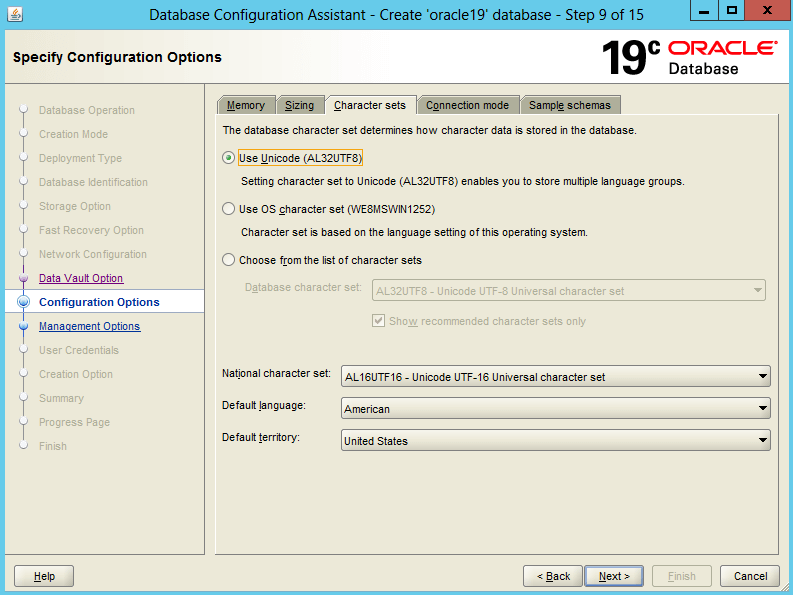
9. Specify configuration options
Memory allocation: The Memory tab enables you to control how the database manages its memory. You can either use:
- Automatic Shared Memory Management if you want to allocate specific amounts of memory to the SGA and aggregate PGA to your database instance;
- Manual Shared Memory Management if you want to allocate specific memory amount for each SGA component and the aggregate PGA;
- Automatic Memory Management if you want Oracle to automatically tune the memory components of the SGA, and allocates memory to individual PGAs as needed.

Block size and processes: this tab allows you to set the database data block size and the maximum number of user processes that can simultaneously connect to the database.
The maximum number of processes depend on many parameters. The value you select should allow for all background processes, user processes, and parallel execution processes. A small value for the maximum number of processes may result to the database not running.
Character sets: Use this tab to to determine how character data is stored in the database. Select Unicode (AL32UTF8) as the database character set.
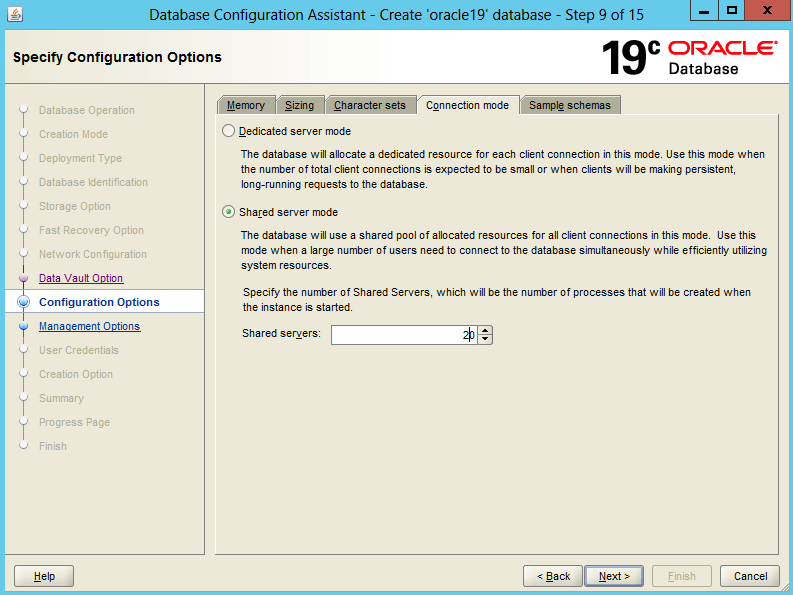
Connection mode: this tab enables you to select the database connection mode.
In Dedicated server mode, each user process is associated with a dedicated server process. This option is suitable when the number of clients is small.
In Shared serve mode, several client connections share a database-allocated pool of resources. This mode is the best option when client load is expected to cause a strain on memory and other system resources. If you select this mode, then make sure you provide the number of Shared servers.
Sample schemas: this tab allows you to include the sample schemas like HR and OE in your database. Select “Add sample schemas to the database” if you want to use them later.

10. Specify management options
Enterprise Manager provides Web-based management tools for Oracle databases. You can select Configure Enterprise Manager (EM) express and click “Next”.
If Enterprise Manager cloud control is installed on your host computer, then you can choose Register with Enterprise Manager (EM) cloud control and provide the necessary connection details (host, port number, username and password).

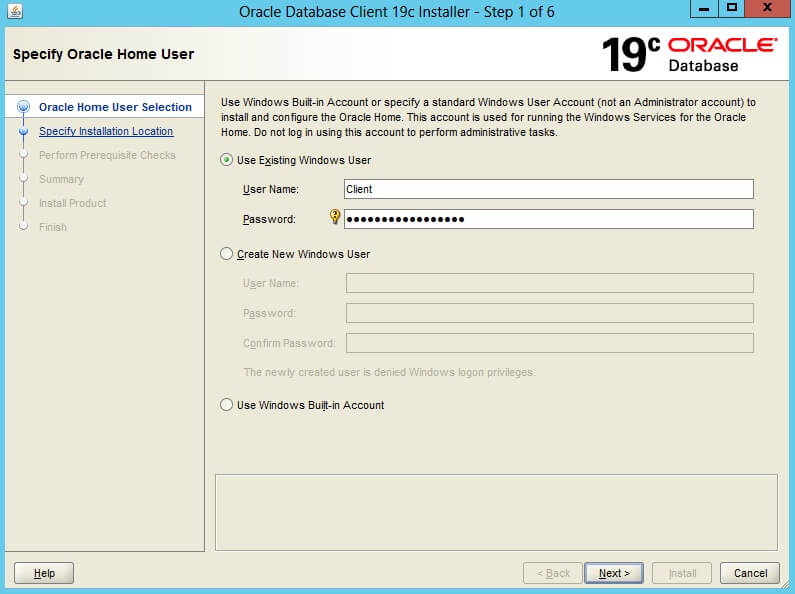
11. Specify database user credentials
Provide passwords for the administrative accounts SYS and SYSTEM and the Oracle home user account. You can specify a password for each administrative account or use the same password for all accounts. For security reasons, I recommend to set different password for each administrative account.

12. Select database creation option
In this step, you can select any of the following options for creating the database:
- “Create database” to create your database now;
- “Save as a database template” to save the database definition as a template to use at a later time;
- “Generate database creation scripts” to generate a SQL database creation script that you can run at a later time.
Moreover, you can adjust the server initialization parameters, relocate or replicate your database files (control files, redo logs, etc.).

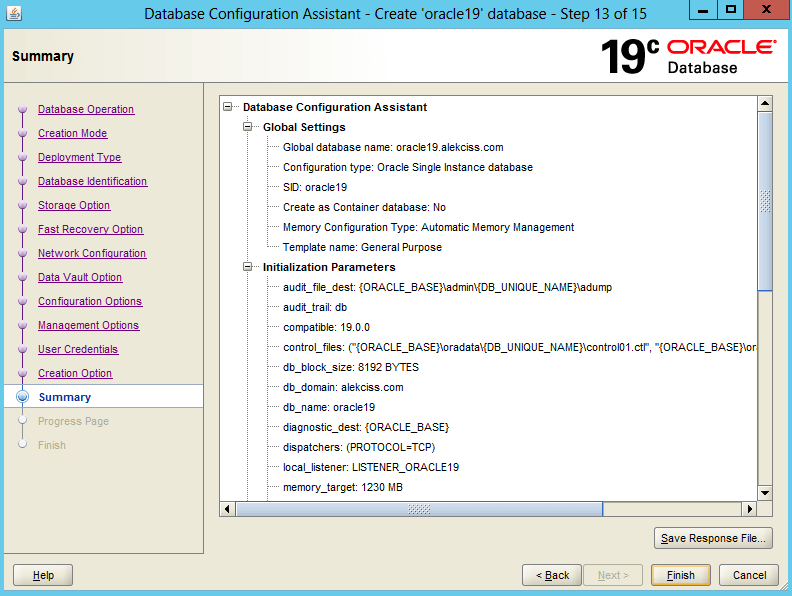
13. Oracle database creation summary
This step enables you to review the summary information. To change any of these options, click “Back” and return to the window where you can modify the option.
Click “Finish” to start the creation of the database.
Voilà! You have successfully created your Oracle 19c database with DBCA.
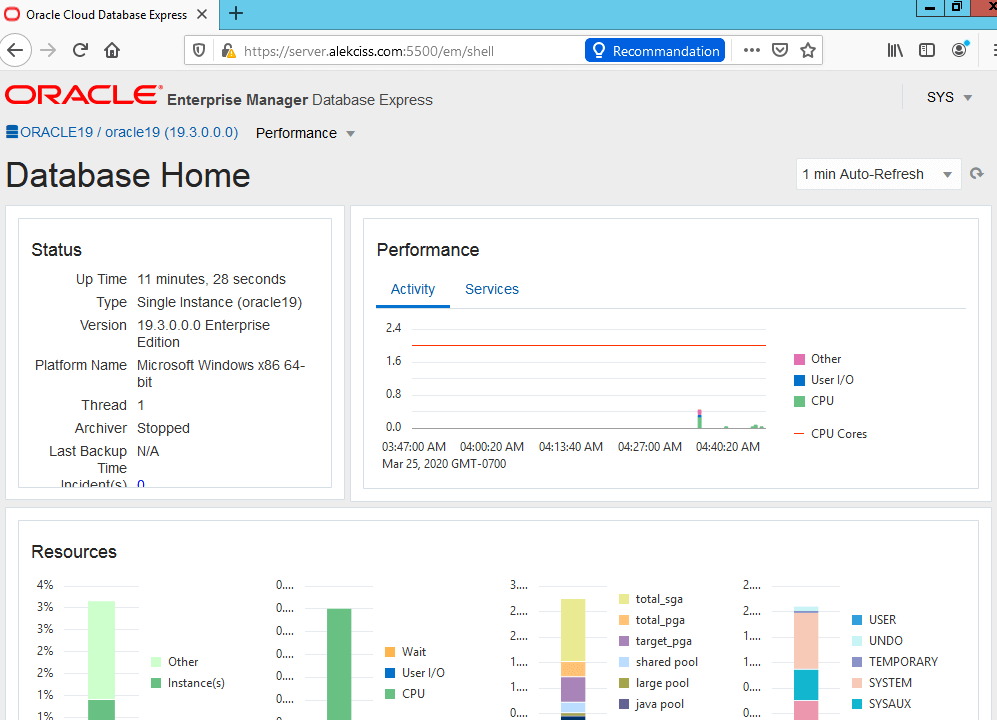
Before closing the window, make sure you copy the “Enterprise Manager Database Express URL”.

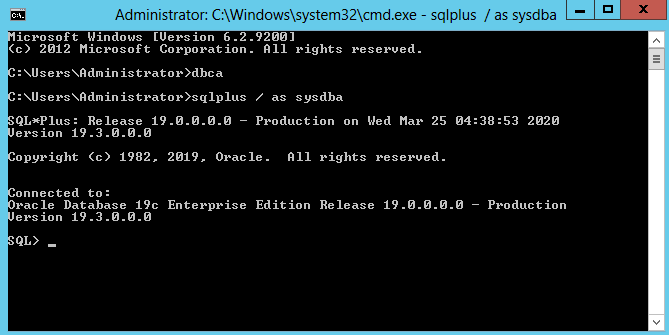
14. Test the database
To check if your database is running properly, you can:
start a new SQLPlus session with an administrative account.
or connect to EM Express with SYS administrative account.
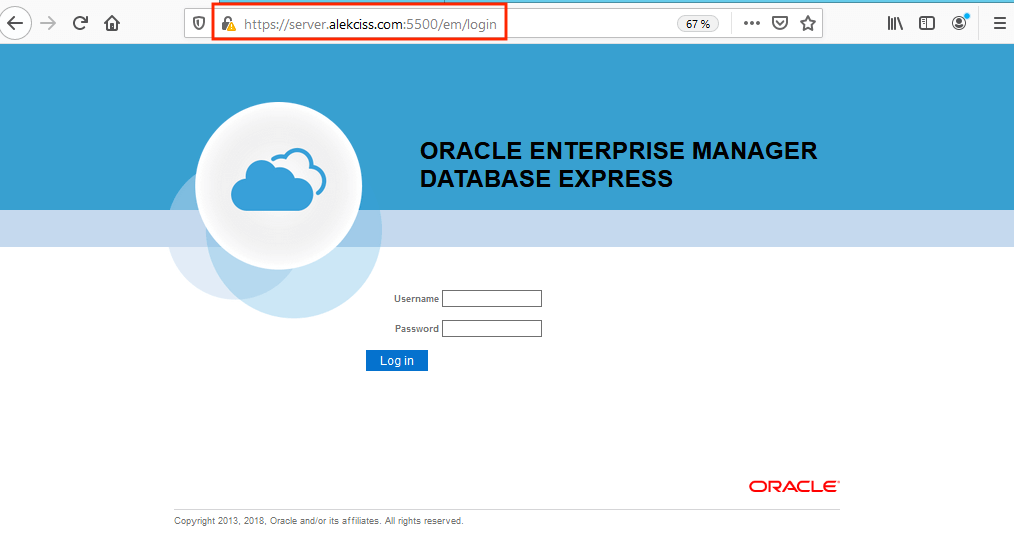 You should see the following screen if everything is okay.
That’s it. Still having issues creating a database in Oracle 19c? Let me do it for you.


Comments are closed.